Embroidery on Paper
Menu
Anne Warburton, Fibre Artist
  • Home
  • Fibre Gallery
    • Fragments
    • Rust & Corrosion Series
    • Lineations Series
    • Lichens
    • Mixed Media, Embroidery
    • Urban Refurbishment
    • Hand Series
    • Haiku & Photography
  • Musings
  • Artist Statement
  • CV
  • Media
  • Home
  • Fibre Gallery
    • Fragments
    • Rust & Corrosion Series
    • Lineations Series
    • Lichens
    • Mixed Media, Embroidery
    • Urban Refurbishment
    • Hand Series
    • Haiku & Photography
  • Musings
  • Artist Statement
  • CV
  • Media

Alphabet Book - numbers 2 & 4

6/2/2014


2 - This is about altered book pages. Although no longer in a book, I did follow the normal process - I took 4 pages, added gesso to glue them together, which makes quite a nice thickness to work on, then altered the pages by adding words (using Sharpies) and adding a bit of coloured pencil to the background. I then cut out the number.


4 - Steampunk - Steampunk is based on Victorian England in the days of steam engines, gas lanterns, clocks with gears, corsets, even fascinators. The idea is to take an item from that era and upgrade it into something futuristic - or to take the pieces and remake them into a piece of modern art. In this case I took some metal items and added them to a piece of metal grid, cutting the grid into the number 4. 
Picture
Picture

Alphabet Book - Numbers 0 and 9

5/26/2014

 
Two more numbers done this week:

0 - This was an exercise in learning to make cording. The material I chose - called Knotmore, new product from the U.S. - was slippery to work with as it's waxed, but overall I'm pleased with how it turned out. Not as neat as I'd like perhaps, but at least I now know how to make cording.


9 - I had been wanting to try embroidery on bookcloth for some time. My plan was to add words in a metallic thread, much, aiming for a look similar to the gold lettering used on book spines. Alas, the metallic thread kept breaking as I worked on the bookcloth (it's a leather-type material). So I then switched to a silk thread, which worked much much better. I'll need to continue trying different types of threads to see what else may work and if I can eventually get the gold colour. 
Picture
Picture

The Alphabet Book grows again

5/20/2014

 
Picture
   
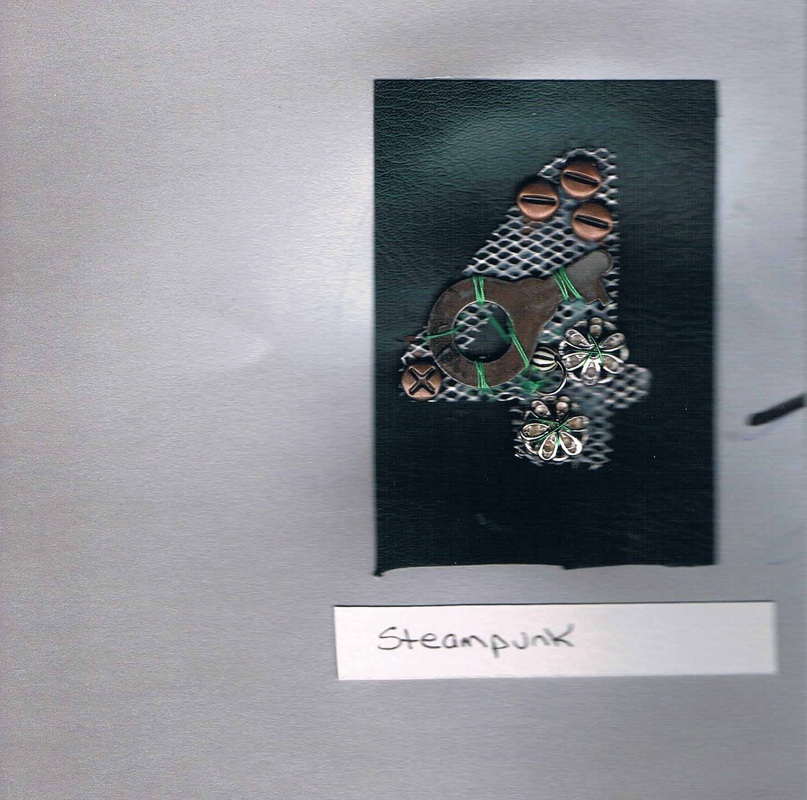
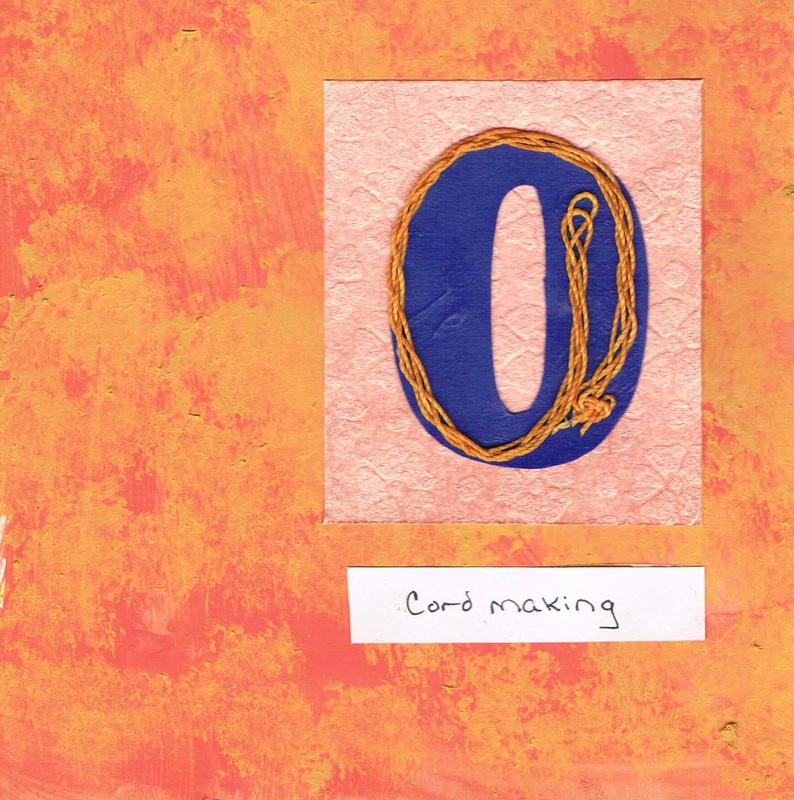
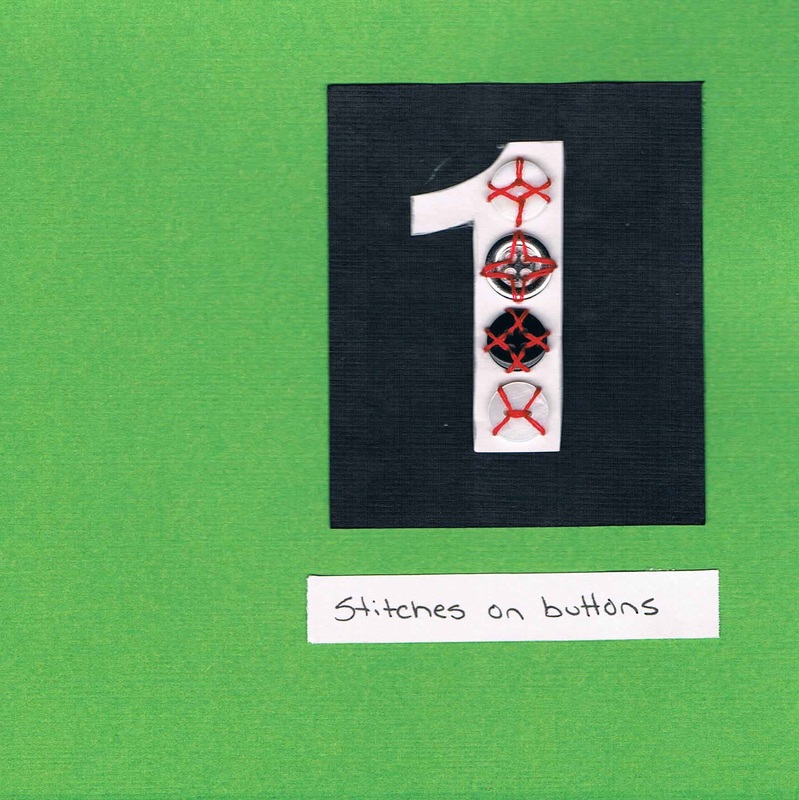
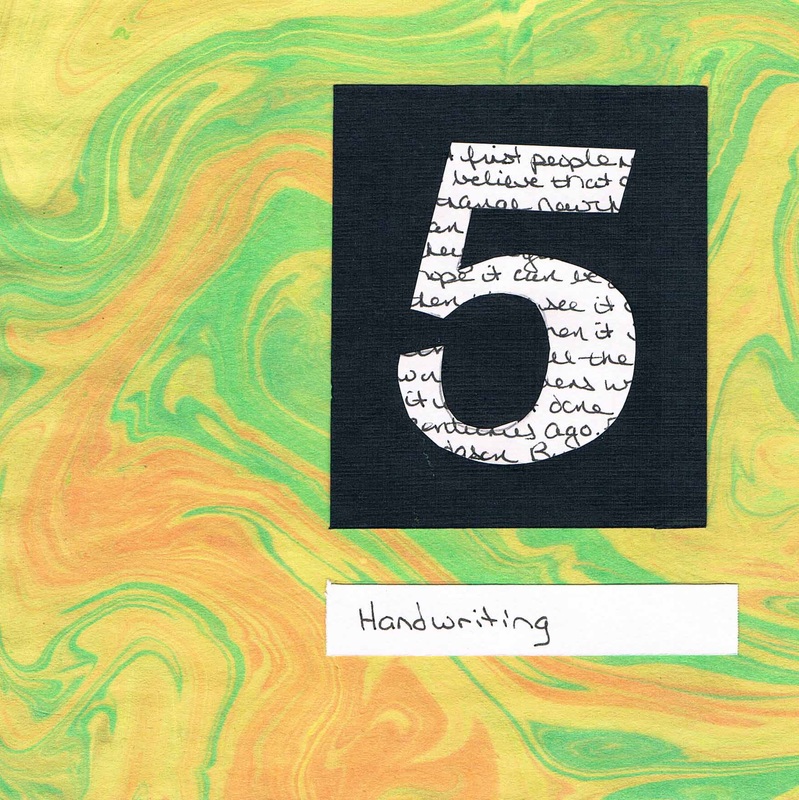
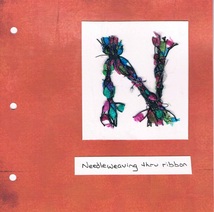
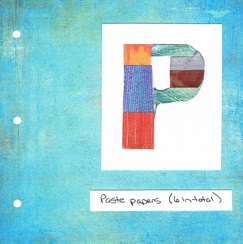
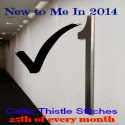
Following its completion back in March, the Alphabet Book has travelled to a few different venues and is next scheduled to be shown at the Navan Fine Arts Show & Sale June 6-7 at the Navan Curling Club. Other upcoming venues are listed on the events page. 

An addition is planned for the book - although only parts will be ready for the Navan show. I hope to have some of the new pieces available for viewing even if they are not yet inserted into its pages.

And what are those pieces?

The numbers 0 thru 9. By adding numbers, I will have more flexibility to make additional items such as birthday cards. Each letter - and eventually each number - has been scanned so that cards and other pieces can be made. 

Numbers 1 & 5 are done (see pictures below - click on the image for a larger picture).

- 1 is various types of stitches used to sew on buttons
- 5 is handwriting

And while this list is not final, here are some thoughts on the other techniques and/or materials that may be used for make these new additions (and in no particular order and with one extra in the list). I'll be trying to post the completed ones on Sundays. 

- water soluble paper
- altered book pages
- steampunk
- needle felting
- lutrador
- smocking (non-traditional)
- cord making
- embroidery on book cloth

Picture
Picture
Hope to see you at the Navan show!

Alphabet Book - Y & Z

3/2/2014

 
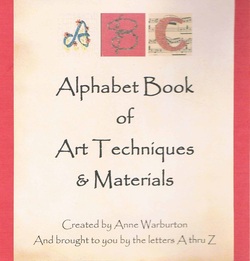
Wow, this has been a fun undertaking. About half way through I was already mourning finishing this project, and wondering what I would do next.  The last 2 letters are at the end of this post. But first, I wanted to mention some observations about this project that I've made over the past two months:
  • I really do work better with music playing than in a quiet room.
  • This kind of project pushes one to try to use all those materials purchased over the years with great intentions to try or use, but which got stuck in a cupboard somewhere. I dug these out and can now say that I have tried them and, even better, would use them again.
  • There are some great art technique books out there. You just have to take the time to
    read through and try the techniques, and not worry about the results. Some are great, others not so great.
  • I think this project worked so well as all the steps were laid out clearly. A, followed by B, C and so on, and with the techniques or materials identified in advance. Projects without a plan, well, I just seem to fumble all over those until a clear plan emerges.
  • The concept of taking detailed notes during an art class was reinforced (some of my old notes were great, others not so great). We tend to think we have good memories. But it is so easy to forget important details or the order of steps to take, especially when we don't immediately practice a newly-learned technique. Thank goodness for Google.
  • I am noticing that I'm starting to incorporate more of the techniques and materials that I tried in the ABC book in other projects, where before I had not. This is good.

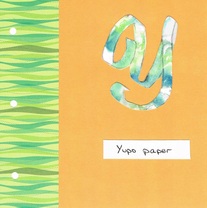
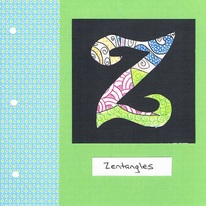
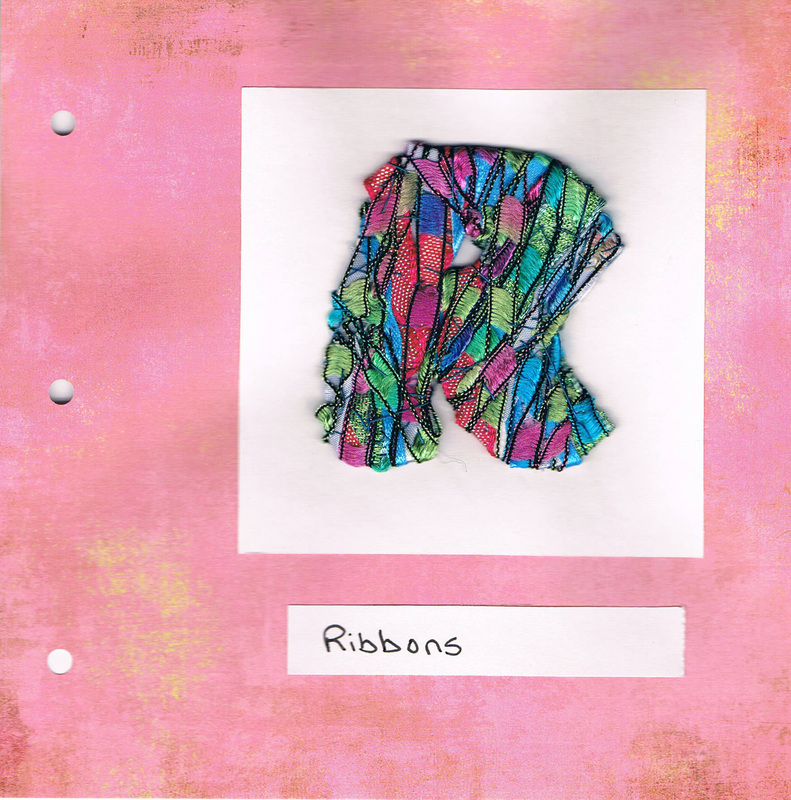
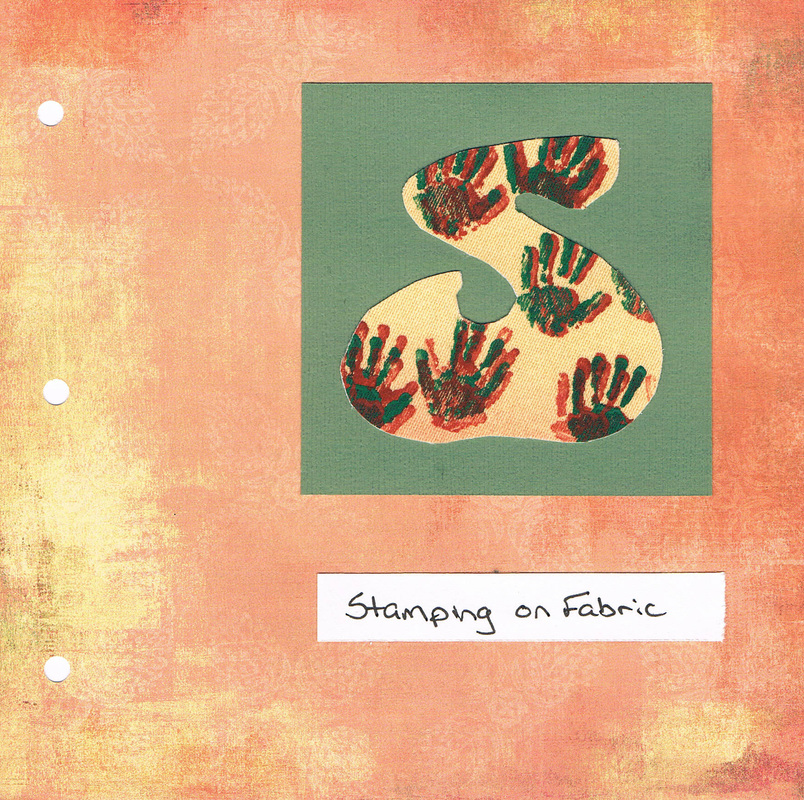
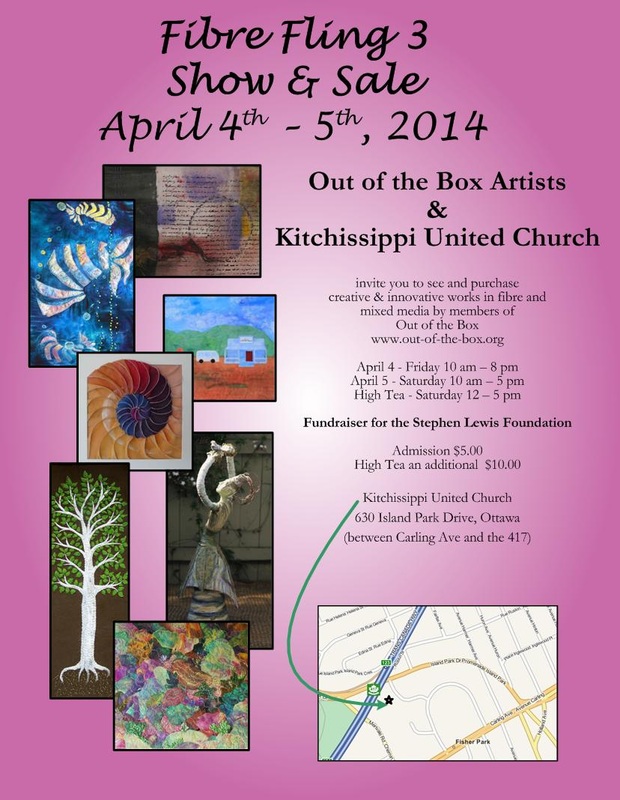
Now, on to the last two letters. And be sure to come by the Fibre Fling show April 4-5 and see the completed ABC Alphabet Book, as well as other projects I've been working on. The show looks like it will be amazing.
 
Y - Yupo Paper
This feels like a plasticized paper. I used watercolour paint, and it definitely moves around with a mind of its own. I'm quite pleased with the effect.

Z - Zentagles
These were oh-so-fun. I first made a larger picture (about 4x6, using coloured pencil and a black pen. 
I  then cut out a Z to determine which part of the picture would look best, then cut out a Z out of the picture. I need to practice doing more of these.
Picture
Picture

Alphabet Book - W & X

2/23/2014

 
The pressure was on for the letter W. Family members - whose also have a last name that starts with W - indicated they were quite looking forward to seeing this letter.

So here it is. Since it's name begins with the word "double" I decided to double up on "W" techniques. The first technique was to paint the background (fabric) with watercolour pencils. Once it dried, I gelled the fabric onto a stabilizer. The second technique was the embroidery using 2 different stitches (including the Whip stitch) and in 2 different colours. (Click on the image to see a larger size.)

Have I met the expectations?

Next, on to the letter X. I never did find a technique or material to fit this letter, so I went with "texture" since it does at least have the letter X in it.
Three textures are included here: a sand resin (green), moulding paste (blue) and a smooth polymer medium (orange).
Picture
Picture

Letters T, U & V

2/16/2014

 
The countdown is on, only 4 letters left.

Letter T - Tissue Paper - a surprisingly versatile medium. 
I started with white paper, added blue acrylic paint and a polymer medium. After it dried, I added a stabilizer to the back using a gel medium to give it more strength so I could then add the embroidery stitches.


Letter U - is for "Upcycled". The definition of upcycling is re-using a material for another purpose (vs. recycling which is about re-using the material for the same purpose).
To make this letter, I gathered up old Christmas cards and tore them into small pieces to make a collage in the U shape, then added a bit of stitching to complete the look.


Finally, Letter V - Van Dyke Stitch.
Originally the letter V was to be velvet embossing. I followed the instructions, tried a second time, but just wasn't happy with the results. So after a bit of research, I stumbled across the Van Dyke embroidery stitch which I had never heard of until this week. I'm quite taken with how it looks and will definitely use it again. This is a great example of being happy about the original plan not working out!
Picture
Picture
Picture

Letters Q, R and S - only 7 more to go

2/9/2014

 
Q - Quilting -
This is the first time I have tried quilting, and my thanks go to Quilting Arts magazine for instructions.
I did not use batting (the book is getting quite thick after all), but did use a stabilizer which was recommended in the magazine. All the stitching was done by hand, and the felt and letter appliqued on.

Having now finished this piece, there may be more art quilts in my future!
Picture
R is for ribbons.
I used a variety of colours on the letter to create this collage of ribbon work, using couching to attach the ribbons. I am quite pleased with the result. I have seen large pieces using similar techniques and have loved the effect. Perhaps a large scale ribbon piece will also be in my future.
Picture
S - Stamping on Fabric
I watched this technique done in India using vibrant colours and creating beautiful fabrics.
Here I used a hand stamp with 2 colours of acrylic paint. Looks like it was made that way I think.
Picture
The Alphabet Book will be on display at the Fibre Fling Show & Sale - details below. Click to enlarge the poster.

http://www.out-of-the-box.org/
Picture

Letters N, O & P of the Alphabet Book Project

2/2/2014


N is for needleweaving. I wrapped strips of ribbon around a piece of cardboard, then did the weaving with a needle & thread to create the letter. Once done I cut the weaving off the cardboard and adhered it to a background.
Picture
Picture
  
O is for oil stix. I used this oil paint over some textured plates to create the coloured effects on the green and the peach coloured fabrics. I then cut out the O and used fabric glue to attach it. This will be a good project to try again to get some interesting backgrounds.

P is for paste papers. This letter P includes 6 different papers, with varying colours and textures. Some I made with a wheat paste and others with cornstarch paste. I definitely prefer the wheat paste and one day will try to make it with a gluten-free flour.
Picture
Follow on Bloglovin
    Awakening the heart 
    with art
      
    Artist - Anne Warburton
    Picture
    Follow my blog with Bloglovin
       
    Subscribe
    & add this blog to your RSS Reader with this link:

    RSS Feed

     
    Or email me:
    annewarburton@hotmail.com
     

    Categories

    All
    Alphabet Book Project
    Art Links
    Art Projects
    Art Projects
    Colours
    Community Art Mural
    Creativity & Inspiration
    Creativity & Inspiration
    Creativity & Inspiration
    Miscellaneous
    School Of Art


    Bookmark and Share
    Bookmark and Share
    Follow Me on Pinterest
    View my profile on LinkedIn

    Picture
    2 Bags Full
    Picture
    Celtic Thistle Stitches
    Picture

    About Me

    It's taken years to discover the medium I enjoy the most. And how what I have learned before somehow fits into what I am doing now. Even when I travel my needles and threads are with me so I can continue to create while away.

    It's been wonderful being able to share my work with others and to be a part of an artistic network that continues to grow and develop.

    If you have ideas you would like to suggest, please let me know. And check back regularly to my web site for updates.


    Archives

    June 2016
    May 2016
    February 2016
    January 2016
    February 2015
    January 2015
    June 2014
    May 2014
    April 2014
    March 2014
    February 2014
    January 2014
    December 2013
    November 2013
    October 2013
    August 2013
    June 2013
    March 2013
    February 2013
    January 2013
    December 2012
    November 2012
    October 2012
    August 2012
    July 2012
    June 2012
    May 2012
    March 2012
    February 2012
    January 2012
    December 2011
    August 2011
    July 2011
    May 2011
    April 2011


Powered by Create your own unique website with customizable templates.
Embroidery on Paper Embroidery on Paper designs by Anne Warburton