 Have you ever been in a flea market or second hand store and come across old photographs with no names, date or location on the back? Do you wonder who these people are, or how these photos ended up as orphans? A great grandparent perhaps, a school teacher, the local post master? Is it possible these photos will ever get reunited with their descendents and find their way back into the family album?
Having come across some recently, I decide to buy a few of these old anonymous photos and have now made a book of them. The book will be available at the Navan Fine Arts Show June 6 & 7 http://www.navanarts.com I am hoping that you will add your input to the book about what the lives of these people may have been like. Please come by, pick a photo or more, put pen to paper and help them to discover a life for themselves, for example: - what might their hobbies or favourite activities have been - what do you think they did for a living - where did they live - where were they originally from - did they have children - what did the future hold in store for them I am very much looking forward to reading all the comments and ideas - and seeing what the lives of these people may have been like.
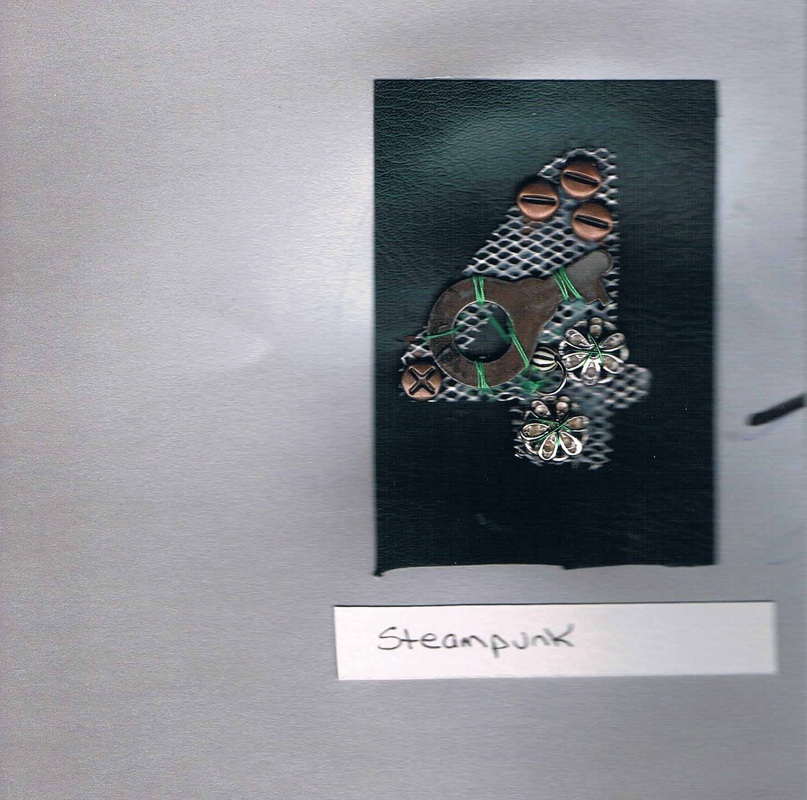
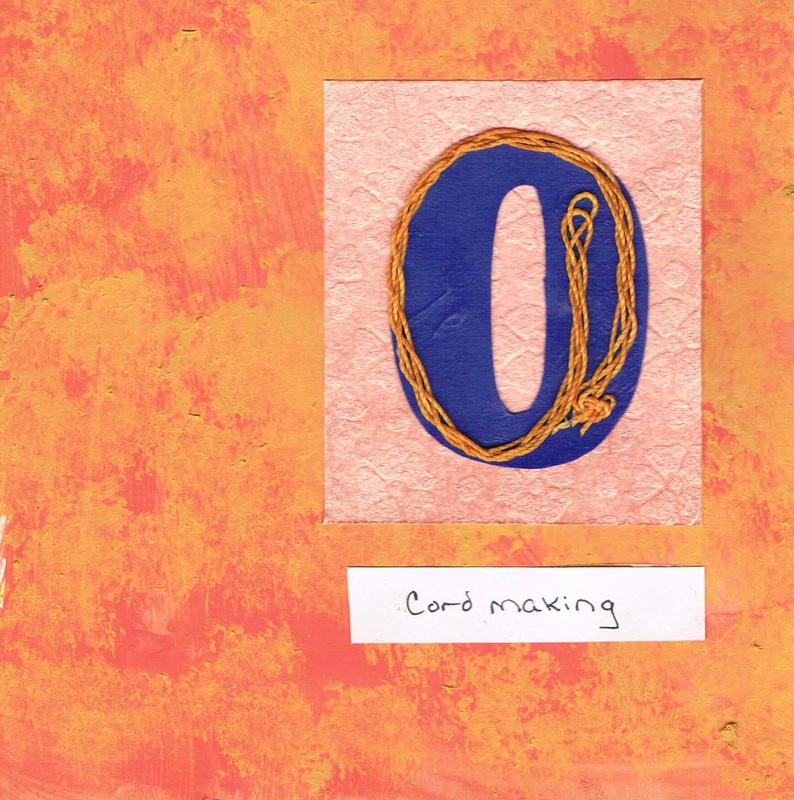
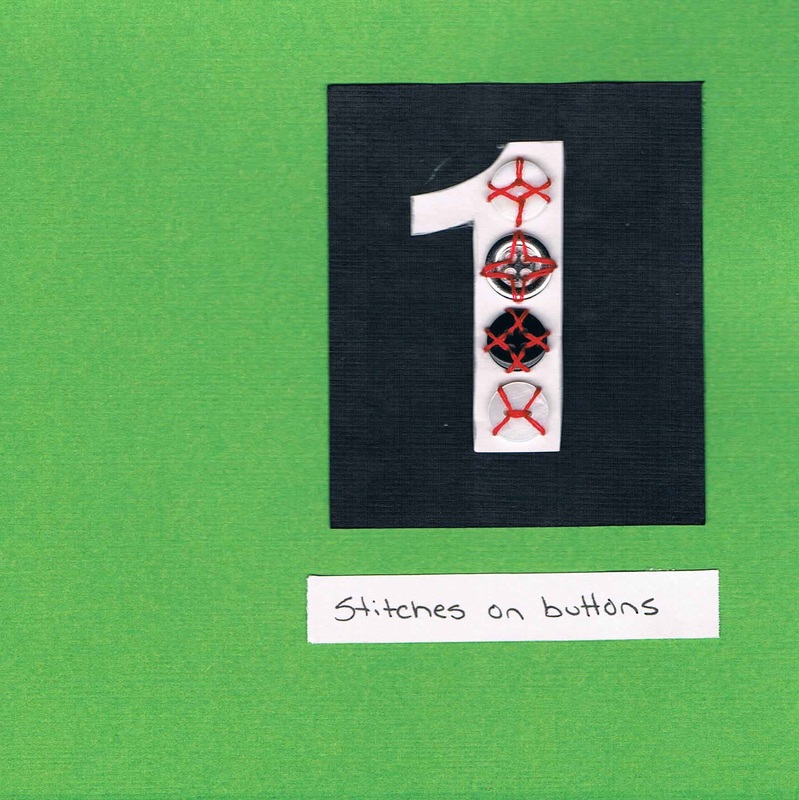
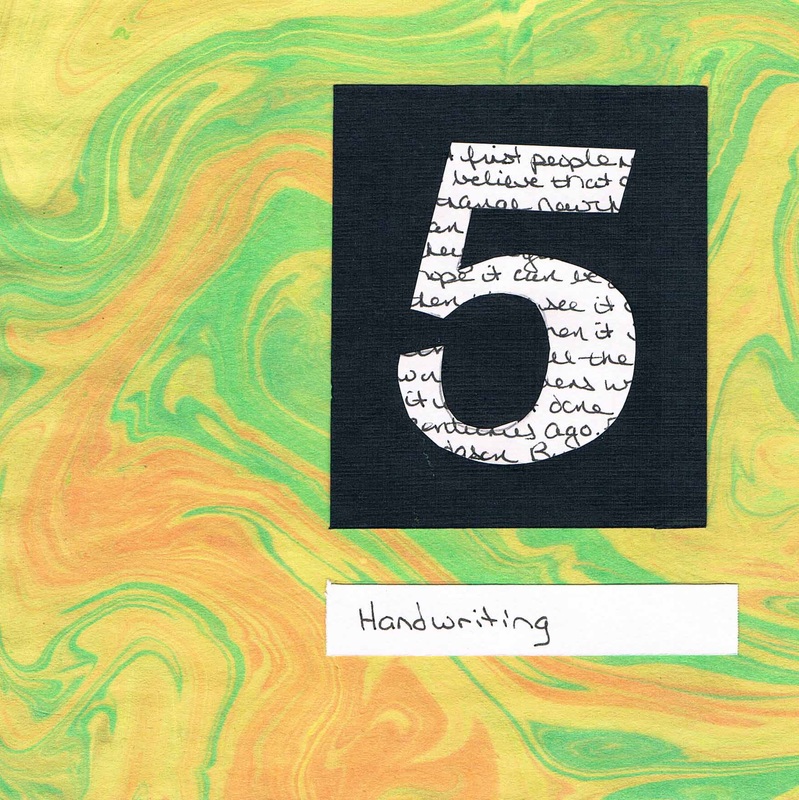
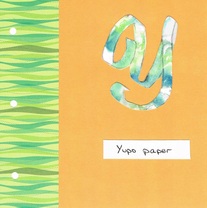
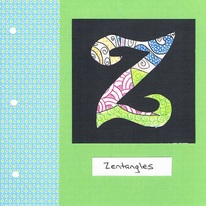
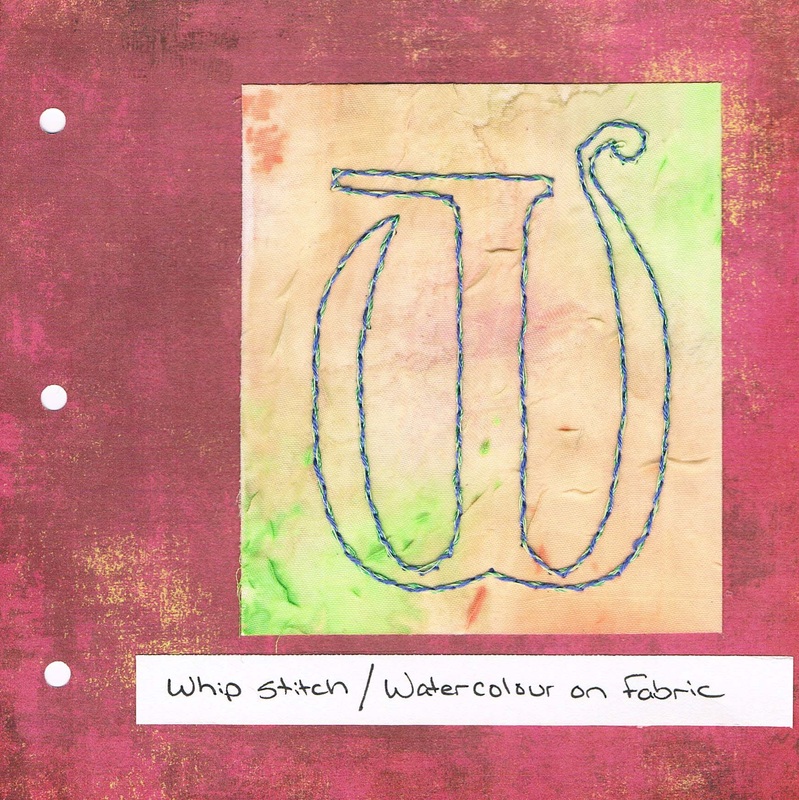
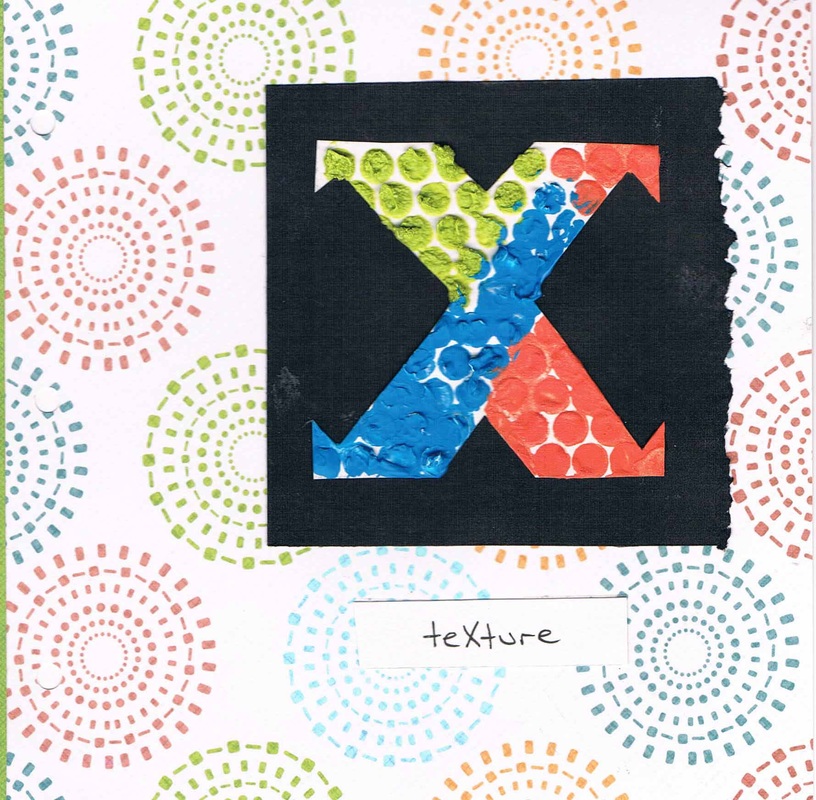
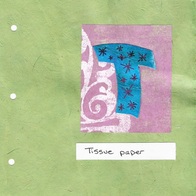
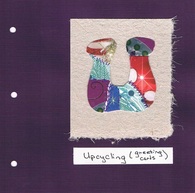
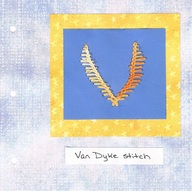
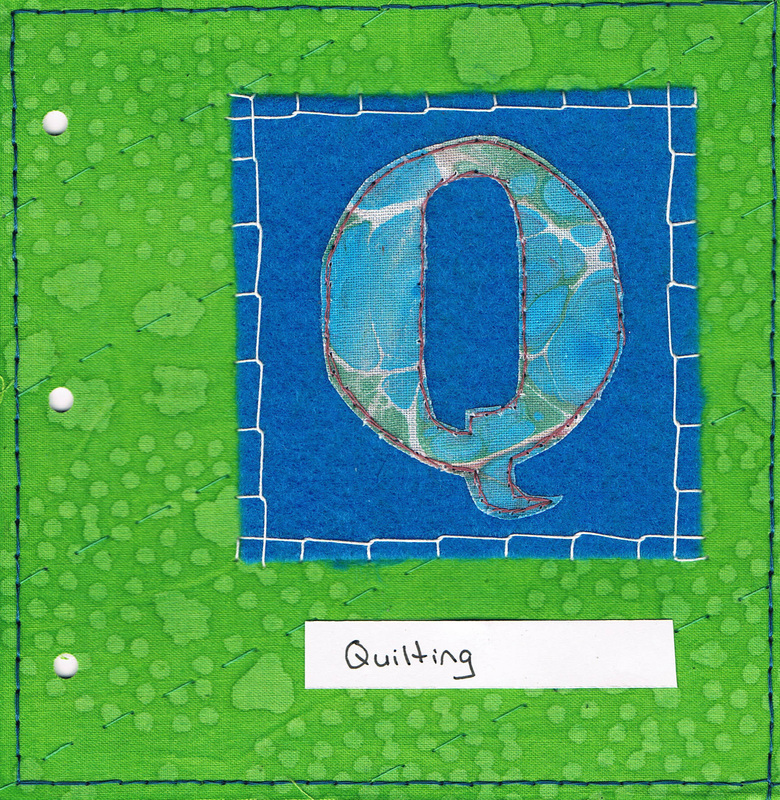
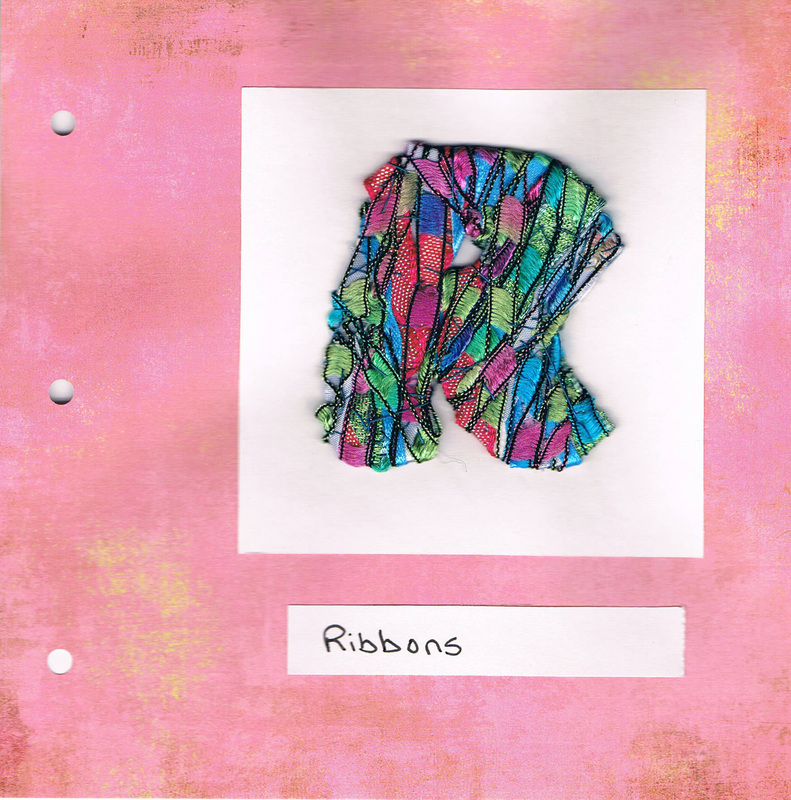
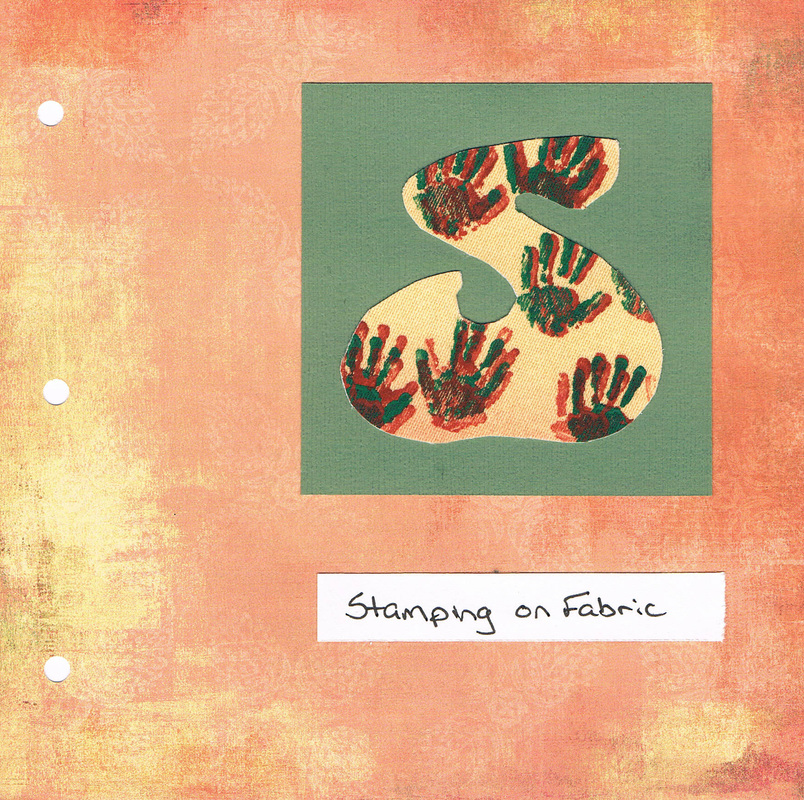
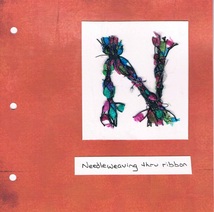
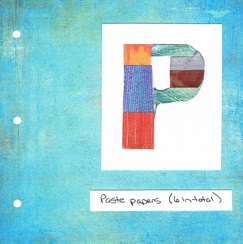
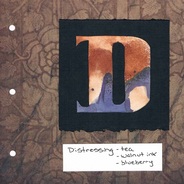
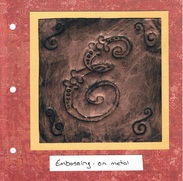
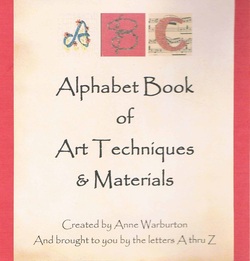 Following its completion back in March, the Alphabet Book has travelled to a few different venues and is next scheduled to be shown at the Navan Fine Arts Show & Sale June 6-7 at the Navan Curling Club. Other upcoming venues are listed on the events page. An addition is planned for the book - although only parts will be ready for the Navan show. I hope to have some of the new pieces available for viewing even if they are not yet inserted into its pages. And what are those pieces? The numbers 0 thru 9. By adding numbers, I will have more flexibility to make additional items such as birthday cards. Each letter - and eventually each number - has been scanned so that cards and other pieces can be made. Numbers 1 & 5 are done (see pictures below - click on the image for a larger picture). - 1 is various types of stitches used to sew on buttons - 5 is handwriting And while this list is not final, here are some thoughts on the other techniques and/or materials that may be used for make these new additions (and in no particular order and with one extra in the list). I'll be trying to post the completed ones on Sundays. - water soluble paper - altered book pages - steampunk - needle felting - lutrador - smocking (non-traditional) - cord making - embroidery on book cloth
Hope to see you at the Navan show!
We have been working in our class with Tibetan papers (fibrous but somewhat translucent papers) and rice papers. After creating a collage using handmade papers, fabric, photos and other interesting pieces, we had the choice of using a gel medium or encaustics (beeswax) to attach all the pieces together. Most of us put an extra piece of Tibetan paper on top, forming a sandwich. I guess I didn't add enough gel medium, and the great papers and fabrics I had in the sandwich didn't show well once the medium had dried. The colours are definitely there, but only some of the detail can be seen and only in some spots. Decision time. Do I start over and try another piece, or do I see if I can make something out of this piece. Not wanting to start over, I decided to persevere. After all, sometimes our artistic accidents turn out to be a good thing. And it's only through continuing with the piece that we know if we'll end up with something that will turn out even better than the original plan. 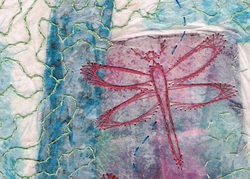 Although this piece is about only half finished (again I took on way too much and have oodles of homework), I'm getting a textured look by adding a design common in the 18th century (the meandering thread line in green) plus the dragonfly as a focal point. The focus is now on the embroidery instead of on the papers and fabric sandwiched in the middle, and which are now a colourful background. The picture here is just a small portion of the piece - about 1/6 of the whole thing.
The Ottawa School of Art is giving us gallery space from March25 to April 8 at the Shenkman Arts Centre - I'm thinking this piece, if finished, will be on display. If not this one, then I better get cracking to start something else! Wow, this has been a fun undertaking. About half way through I was already mourning finishing this project, and wondering what I would do next. The last 2 letters are at the end of this post. But first, I wanted to mention some observations about this project that I've made over the past two months:
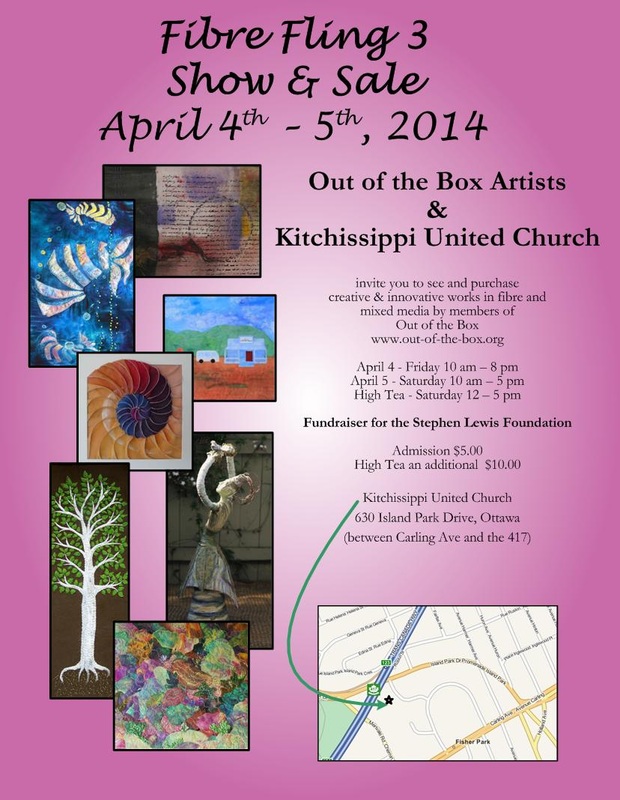
Now, on to the last two letters. And be sure to come by the Fibre Fling show April 4-5 and see the completed ABC Alphabet Book, as well as other projects I've been working on. The show looks like it will be amazing.
  Perhaps I have been overly ambitious.
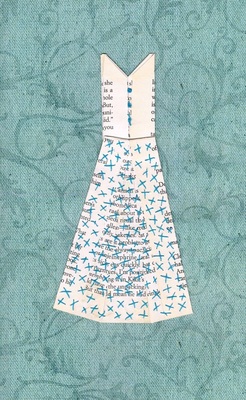
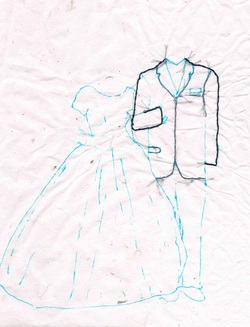
We started our first project in class yesterday doing a contour drawing of an item of our choice, then learning techniques to embroider the drawing on paper. We are using Tibetan paper which is very thin and translucent but quite strong and fibrous. It wrinkles easily but can be ironed later. Clearly this is a work in progress. The bits in light blue are my working drawing. These lines will get washed out once the project is complete. The dark lines are what I have completed so far in thread. Out of interest, the dress and suit are from my parent's wedding photo, taken almost 52 years ago. I have no idea how long this will take to complete. It's now homework as we move to another project next week, but I am not alone as everyone in the class was quite ambitious. We did promise to bring in this project once it's done and I will continue to post updates as I work on this piece.
Which works better: Making New Year's Resolutions or choosing a theme to guide you for the year?1/4/2014
I chose a theme for 2013 - Connections - and made lots of new connections, connecting with people and connecting the dots. My theme for 2014 is Innovation. And I'm already starting to see it being realized.
Here's to 2014! I've been thinking back over the past year about the group of women I was teaching coloured pencil to at a local retirement home. They have been a most enjoyable group, with varying art backgrounds and all with a willingness to come to class and simply enjoy the projects we work on. I have been very fortunate to work with this group. I wanted to share a few of the more interesting moments that have come up. Do any of these sound familiar? "Quit hoarding the colours. We can borrow but they have to be returned too." "I'm amazed at how different each of our styles are." "But what if I wreck it?" after asking what would happen if... and receiving a response to give it a try and see. "Why do we get so stressed deciding what colour to choose next on a painting? Really, if that's the most difficult decision of our day, then we've got it pretty good." When about three quarters complete on an abstract painting: "This is getting monotonous. But it's also mesmerizing." And my favourite: "Did you notice that the colours you chose for your painting are the same colours as in the blouse you are wearing?" "And your painting is also the same colour as your shirt!". "And you too!" Five of the ladies that day chose the same colours as they were wearing! While looking for some fresh ideas to use when teaching coloured pencil techiques, I stumbled across a fun website - colourful, lots of ideas - basically to make doing art fun, and geared to all skill levels. All free ideas, from someone who wants to share her passion with others.
http://www.art-is-fun.com/ There are suggestions for different mediums - not just coloured pencil, but also pastel, watercolour, ink, acrylic - and also for different styles and subjects. Check out her newsletter too. Lots of fun ideas and links each issue. Hope you enjoy. If you've found a website you enjoy and share, please let me know and I will post it here. With three shows at which I am/was selling this spring, I wanted to create some new pieces. The problem was, once they were finished, I fell in love with them and then struggled with whether or not I wanted to put them up for sale, assuming there was even an interested buyer.
For now I have some of the new pieces hanging in my dining room so I can enjoy them for a while. I thought about trying to make similar ones. But that seems like extra work . And there are other pieces I'd like to work on. Plus I don't even know if these new pieces will sell. Then I made another piece, this one with no intention to sell, but intended just for us, from a photo we took on a recent vacation. This piece too I felt a fondness for. But the difference was this time my fondness was due to the memory it invoked. The other pieces, while I still very much like them, don't conjure memories. So now I'm ready to let them go. They'll be up for sale this coming weekend. And if one or more sells, I think I'll be tickled pink! And I'm just curious - anyone else had this kind of experience? Last fall in our Village, some scarecrows appeared one day around the picnic table in front of the local restaurant.
We observed several people doing a double-take before they realized that these were not real people sitting at the table in the cold drinking their coffees. These scarecrows did look like real people, dressed in plaid shirts, jeans or dark pants, some with hats. It really was a hoot to watch the reactions. The scarecrows were there for a couple of weeks, as I recall, before the same arrived. Where did they come from and who placed them there? A few weeks later Christmas wreaths appeared on a fence on the main street. Some may have thought it was the nursery school or fair board who placed them there, or the committee that has recently had the town clock installed and who had decorated that area for the season. But I happen to know it was not either of those groups. But there was more. Reindeers appeared on a strip of grass on the main street. You know the ones I mean; the Christmas deer that are all white and covered with lights. Only these ones no longer had lights, they were just the frames of the deers. Nonetheless they looked festive, as someone had added red ribbons. No one left a calling card for any of these random acts of creativity. But what nice ways to add some decor and a wee bit of fun to our little Village. I wonder what the spring and summer will bring. Do you find it hard to get started doing art or other creative endeavour, or even getting started on a large project? Do you find everything else to do, except getting started? Even cleaning the house seems to come first and even though being creative is so important to us.
And this is doubly important to me to get going more on art - one of my New Year's resolutions. When it comes to getting into the creative spirit, some would have us believe that all we have to do some doodling - that is supposed to get the right brain stimulated enough to get us started. If you're like me, that doesn't work. Okay, here are some ideas that I find really do work - perhaps not every single time, but they do work more often than not: - Schedule time to do your art with another person, then you are motivated to get started, and not to find other stuff to do instead - Play background music - music facilitates creativity and can help you hold your attention on a project longer than if there is no background music. (for a bit more info see my blog from last month) - The kind of music you listen to while creating matters. Hard rock or metal may provide too much excitement, while impressionistic can help with free-flowing ideas, and classical will benefit special perception. Country music will stir up memories and emotions, chants or drumming will lower your pulse and help provide a calm environment. - Go for a walk or a drive. The visual stimulation helps kickstart the creative ideas. I used to find my drive home from my office was the best time for processing issues and finding solutions. And if you listen to music at the same time, you will notice even more benefits. - Sing or hum - Singing and humming uses both sides of the brain at the same time. - Move, dance, drum, conduct .....try one of these and see how you feel. Hope I've given you some inspiration here. Really, the cleaning will still be there tomorrow, so try one of these ideas to get started on that project. I'm sure you have felt, as I have, how some pieces of music speak to you, they touch your soul, maybe you feel a tingling.
A few years back a group of us were working on an art project. Soft music was playing in the background. After a time, one of the women commented that she no longer felt creative, something had changed and she was now "stuck". One by one we each stated we were feeling the same. What was going on? Then we realized the problem: the music had stopped. Once we started it up again, we each got back into our creative groove, and continued from where we had left off. This is the power that music can have on us. Our children often tell us they feel they do their homework better while listening to music. We tend not to believe them - but they are right. However in both cases - doing homework and being creative - listening to words in music can be distracting and not provide the right kind of energy to allow us to focus on our task. It's much better to listen to music without the sounds. A good friend recently confirmed this to be true, when during a painting day she asked that we change a CD for one without words. Once changed, a different CD brought in better energy and opened us up to being more creative. So next time our kids tells us that music is helping them with their homework, let them know they are right, and help them to choose the music to enhance their studying. |
Artist - Anne Warburton


About MeIt's taken years to discover the medium I enjoy the most. And how what I have learned before somehow fits into what I am doing now. Even when I travel my needles and threads are with me so I can continue to create while away. Archives
June 2016
|