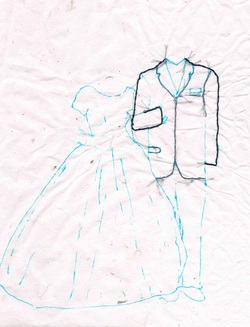
 Perhaps I have been overly ambitious. We started our first project in class yesterday doing a contour drawing of an item of our choice, then learning techniques to embroider the drawing on paper. We are using Tibetan paper which is very thin and translucent but quite strong and fibrous. It wrinkles easily but can be ironed later. Clearly this is a work in progress. The bits in light blue are my working drawing. These lines will get washed out once the project is complete. The dark lines are what I have completed so far in thread. Out of interest, the dress and suit are from my parent's wedding photo, taken almost 52 years ago. I have no idea how long this will take to complete. It's now homework as we move to another project next week, but I am not alone as everyone in the class was quite ambitious. We did promise to bring in this project once it's done and I will continue to post updates as I work on this piece.
We didn't actually start to make anything at yesterday's class, but there was lots of information and discussion and sharing. The instructor and the women taking the class have an amazing variety of experience. I just know this is going to be a great experience.
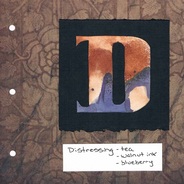
And with a bit of homework assigned to gather the needed supplies and to come up with ideas for what we'll work on over the coming weeks, what I'll be learning should fit just fine with the plan for my next book idea which, until yesterday, had not quite come together. But more on that another day. In the meantime I'm playing with distressing fabric to make a background for one of the projects, and which I hope to include in said book. Forget using tea to distress fabric, walnut ink seems to be working out extremely well. It certainly has more punch than tea. Glad I had tried this on my letter "D".
Which works better: Making New Year's Resolutions or choosing a theme to guide you for the year?1/4/2014
I chose a theme for 2013 - Connections - and made lots of new connections, connecting with people and connecting the dots. My theme for 2014 is Innovation. And I'm already starting to see it being realized.
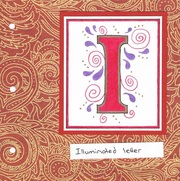
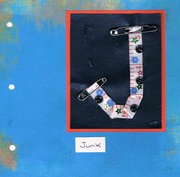
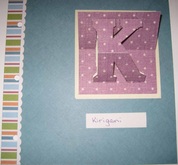
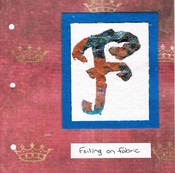
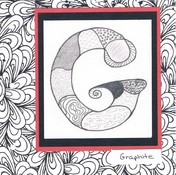
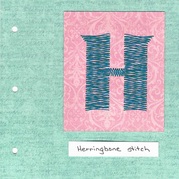
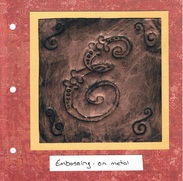
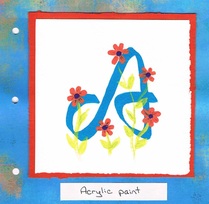
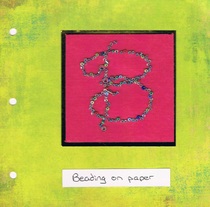
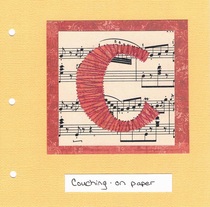
Here's to 2014! I've decided to embark on a new project for the 1st quarter of 2014 - and that is to create a book of the letters of the alphabet, each letter created using a different art technique or medium. This book will then be displayed April 4-5, 2014, at a show being held by the Out-of-the-Box Fibre Artists. To have this done in time, I will need to complete an average of two letters per week plus time to put it all together and make a cover. One of my objectives is to create most of the letters using techniques and materials that I am not very familiar with, so some practice may be required. My plan is to post pictures of at least two completed letters by each Sunday evening between now and mid-March, and in order. The first 3 are shown below. My criteria: - Each letter must be completed using a different technique or material (when it becomes necessary to also incorporate a previously used technique, the main focus must be on the technique or material assigned to the letter) - The technique or material used must start with the same letter as the letter of the alphabet - Each letter must be somewhat flat since they will become part of a book - Each letter must fit on a 6x6 paper - this is the size of book that I am making My list is below. It is subject to change - if a material cannot be located or if I come up with a better suited idea for the letter that I had not thought of up to this point.
I watched her use her fingers to feel the texture and pattern of the thread stitches. I was showing her the book I had made containing photos which I had enhanced with handstitching. Lily, one of the seniors I teach at a retirement home, has a visual impairment that affects her ability to see detail. She could see the photos had thread on them, but could not see well enough to view the individual stitches. So she let her fingers do her seeing.
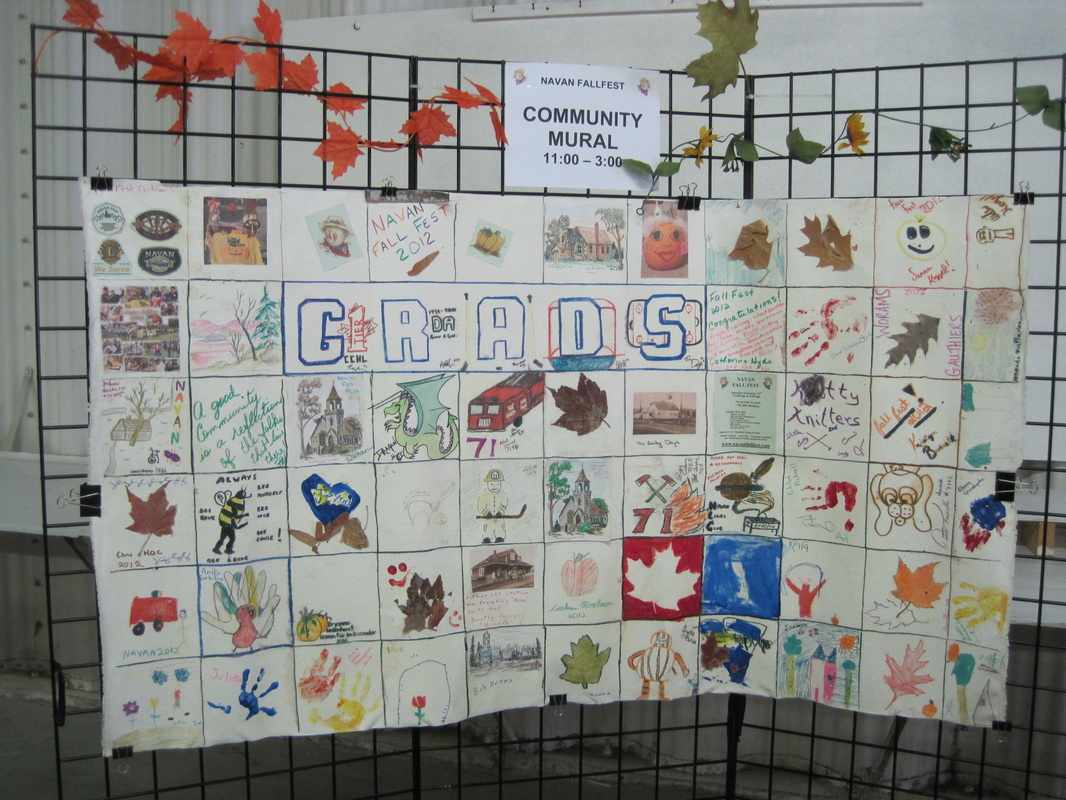
I had previously framed each of these photos, but had decided to move them all to one of my handmade books. It was Lily who had inspired me to do this after showing me a book she had made several years ago that contained photos of her paintings, along with a full record of medium, where the scene was from, when sold, etc. I liked the idea of having all my stitched photos together in one place, creating an art book. I wanted to show Lily the book and let her know that it was she who had inspired me to put this together. Lily has been an artist all her life, exhibiting and selling many paintings, and I have come to admire her very much. We often share our excitement over new pieces, a new technique, or sometimes an older piece. And because of her visual impairment - and vision issues of some of the other ladies at the retirement home - I have tried to adapt the art classes I give so they can all still fully participate. Watching Lily smile as she felt the photos got me thinking that there is so much art out there that can only be enjoyed by seeing. And most pieces do need to be protected from dirt, light, dust and fingerprints. But why not create one or two textured pieces that can be part of an interactive, touch exhibit, appealing to more than just the sense of sight. Something to think about. 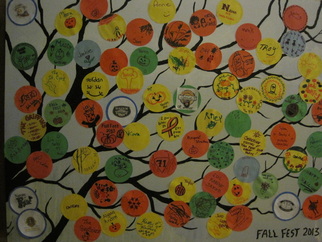 Many thanks to those who came out to our 5th annual Navan Fall Fest on October 5th. This was the 2nd year we have included a community art mural project at this event. Those attending this year's event were invited to sign their name, add a picture or whatever struck their fancy, to their circle of colour, then place onto the painted 3' x 4' canvas. The result was a very colourful display, capturing the wonderful fall colours and the personalities in our community. The mural will be on display over the coming months at the Navan Fair office. Thank you to fellow artist Doreen Hardiman, and to the Navan Fall Fest committee for supporting this initiative. The 2012 mural, pictured below, was displayed at the Navan Memorial Arena throughout most of 2013, then moved to Heritage Public School for a parent event, then to the 2013 Fall Fest. . Many people enjoyed looking over the mural, refreshing their memories on what they had drawn the year before. 2 cups water - bring to a boil
3 heaping tbsp. flour - put in a pot & slowly whisk the boiling water into the flour Boil until translucent, whisking continuously to avoid lumps. Will take approx. 3 minutes to cook. Allow to cool completely. Will store for up to 1 week in the fridge. Put a few tbsp. of the water/flour mixture into paper or plastic cups (ones that won't be used afterwards for food), mix in a bit of acrylic paint, then paint your paper. Add a second colour on top, either while the first colour is still wet or after drying. Try various tools to add texture and "scrape" the 2nd colour off the paper. Ideas for tools: old credit card, old fork, stylus, sponges, stamps, etc. Choose papers that are strong when wet. They may curl as they dry; once dry put heavy books on top for 24 hours to flatten. I have not yet tried this with gluten-free flour, but will try this when I am next making the paste. Will report back.
Considering helping your children learn to draw or paint? Or perhaps teaching a class to a group of children? There's a lot to take into account when setting up a class. I am currently working with a group who are 8-12 year years old; with that kind of age span, it was expected that their levels would be quite different. The course I am teaching is about drawing, but also to introduce them to various art materials and techniques including graphite pencils, coloured pencils and basic painting. We'll end the course with some fun collage projects. Read on...
If you're stuck for ideas, there are loads of great art books at the library. Spend an afternoon browsing and pick out a few that the kids may like and which cover subjects of interest to them. Children have no fear in trying new things, indeed they have been able to laugh at some of their work, but they also work hard and have very much wanted to see good results. Watching their progress has, for me, been very rewarding and I'm hoping they'll be back for another session this spring. Drop me a line if you have any thoughts you'd like to share: annewarburton@hotmail.com or via the contact form. I recently took on the task of writing a history of my mother's life, an idea that started when my sister and I were pre-planning our mother's funeral - which hopefully won't be for many years - but a good idea to get most of the decisions made in advance. It was when we saw the prices charged by the funeral home for a visitor's book and for memorial books that I suggested I would make a handbound book that we could customize as we wanted.
We would include not just the story of her life, but also some photos, a family tree, and, when the time comes, the obituary and funeral program and a section for visitors to sign. The book I have since made is hardcover with a fabric cover, and bound using Japanese Stab Stitch style. Writing her history was not as daunting as I first thought it would be, indeed the more I learned about my mother, the closer it made me feel to her. And I think it will be an interesting read for family and friends, to get to know a bit more about her, not just as an aunt or grandmother, but as the woman she is, her interests, her legacy. I started with a mind dump of facts as I knew them, and then organized the information chronologically. Next I added more facts and dates that I found in photo albums and old scrapbooks, plus some information gleaned from a few family members. To make it read more like a story I rearranged and re-wrote some parts, at times jumping ahead a few years, then picking up again where we had left off. The edits are almost done, I'm very pleased with how it reads. I do feel I know more about her than I did before starting this project. She has had some interesting stories throughout her life and now those are recorded for future generations. Of course her story is not over yet, and so the final version won't be put into our handmade book for some time yet. I do want to mention one person who was of tremendous help to me during this project and that is writer Lee Ann Eckhardt Smith who was invited to my book club one evening a few months back. When we learned she gave workshops on writing memoirs and family histories, we were hooked and arranged for her to give a workshop to our group. It was that workshop and her guidance that allowed me polish the story and make it a story that others will want to read. For more information on Lee Ann's workshops, visit her website at http://www.leeanneckhardtsmith.com/ My husband is renovating our fireplace surround and we were fortunate to score a fabulous piece of barnwood to use as the new mantle.
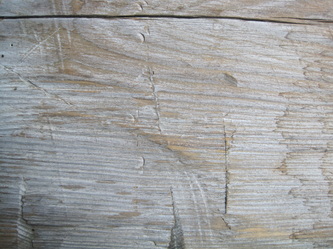
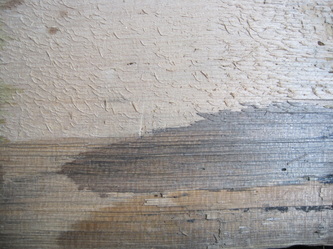
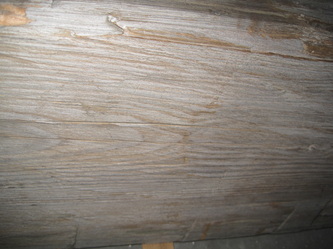
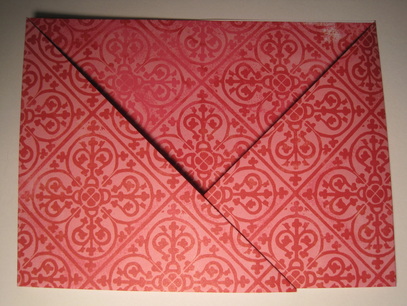
The piece is gorgeous, however the underside and both ends looked like new wood, not the beautiful grey on the top and sides. So we turned to google to ascertain how to age the wood to match the barnwood colour. The recommended solution was to steep steel wool in a container of vinegar overnight or up to 24 hours, strain, mix with water, then spray or brush the solution onto the wood. The only risk was that the wood could turn dark brown rather than grey. Ours did. But there was a solution for that too; by simply adding a mixture of baking soda and water to the treated area, the shade of brown would fade to some degree. After a bit of testing and a little bit of time, we were tickled pink - er, tickled grey - to discover it had worked. We now have a piece of wood with the aged look of barnwood on all sides. Of course there are a number of variables with both of these solutions; how long to soak the steel wool, how much to soak, how much vinegar to use, does it need to be watered down, how much baking soda to mix with how much water, and so on. But with a little bit of time and patience, we got exactly what we wanted, and without the use of store-bought dyes or chemicals. Our new mantle is now in place; next up: hearth and stone. The pictures below show: Left - The nice part of the barn board, showing browns and blue-greys. Middle - The underside of a testing piece. The dark part at the bottom and middle were both brushed with the vinegar solution, the bottom one with more water and less vinegar. The light brown part at the top was prior to any solution being added. Right - The final piece - notice how much closer the colour is to the colour in the first photo. 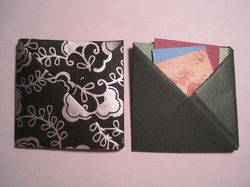 The first time I saw these folded square pocket envelopes, I wanted to learn how to make them. My envelopes shown at left are just 3 inches square, and are quite simple to make. And they can actually hold quite a bit; the one on the right has at least 5 sheets of cardstock in it. What I was really looking to make, however, was a rectangular, not square, pocket, part of our planned design for my stepdaughter's wedding invitations. Not being able to find any instructions online or in books for rectangular pockets, I decided it was time to create a design for one. I quickly discovered it was not as easy as making the square. But where there's a will there's a way, and I had the will, so I found the way. Although I did take a bit of trial and error. And this pocket envelope is easy to make. The difference is that there are more steps to make the rectangle than the square. And probably best to practice making one or two first. But overall I am very pleased with the result.
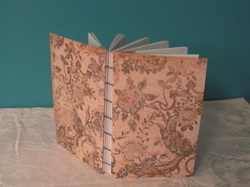 Have you ever purchased a handmade book with blank pages? Did you use it? Or did it end up on a bookshelf somewhere, or even as part of a display on a shelf? I've had a few people tell me that they hesitate to use a handmade book, unless its for a very meaningful purpose. I've purchased several handmade books over the years from various artists, and I'm pleased to say that I've actually used most of the books, albeit a bit reluctantly at first. Now that I've started creating handmade books, I am decidedly sitting on the fence. I've made some that I'm using, mostly because I had a specific purpose in mind for each when I created them. But there are others that I likely won't use because I consider them to be works of art, and so they are now on display or for sale. So I guess the answer is, if you see a handmade book that you like, then buy it. I hope mine will all be used, whether its purpose is as art or as a notebook, journal, sketchbook, recipe book, or other. And I would be most interested to know, if you have a handmade book or receive one in future, is what you hope to use to it for. Drop me a line annewarburton@hotmail.com I've been thinking back over the past year about the group of women I was teaching coloured pencil to at a local retirement home. They have been a most enjoyable group, with varying art backgrounds and all with a willingness to come to class and simply enjoy the projects we work on. I have been very fortunate to work with this group. I wanted to share a few of the more interesting moments that have come up. Do any of these sound familiar? "Quit hoarding the colours. We can borrow but they have to be returned too." "I'm amazed at how different each of our styles are." "But what if I wreck it?" after asking what would happen if... and receiving a response to give it a try and see. "Why do we get so stressed deciding what colour to choose next on a painting? Really, if that's the most difficult decision of our day, then we've got it pretty good." When about three quarters complete on an abstract painting: "This is getting monotonous. But it's also mesmerizing." And my favourite: "Did you notice that the colours you chose for your painting are the same colours as in the blouse you are wearing?" "And your painting is also the same colour as your shirt!". "And you too!" Five of the ladies that day chose the same colours as they were wearing! I have been using my e-reader for over 2 years now, having first purchased it prior to going on a 6-week long trip. Definitely easier than carrying a number of books with me while traveling. And I especially like the convenience of being able to download books without leaving home.
But I do still love books made of paper. As part of a book arts class I am taking, we had a field trip National Archives Canada to look at, and handle, centuries-old leather bound books and manuscripts. The scripts were beautiful and the illustrations all hand-painted using natural materials. Covers were often embossed, sometimes with the initials of the book owner. During our visit we pondered whether this is an art that will one day be lost. But some books just don't lend themselves to e-book technology. My book club met recently with an author who has published a historical book that includes many old photographs and maps. When asked if the book would also be available for e-readers, she hesitated before stating that by including photos and maps, the book would just not work well on an e-reader. Will this hurt sales? Perhaps. Perhaps not. My copy of her book is now on the shelves in my living room and can easily be picked up and read for years to come. We don't know format e-reader technology will be like in, say 50, years and if we'll be able to read today's formats. Oh, one other benefit of paper: My copy of the book is autographed. Not sure how that would work with an e-book. At a recent family fun day held each year in our neighbourhood, we decided we wanted to involve our community in creating an art montage. Visitors to the event was invited to participate by adding their thoughts and ideas to the canvas – a few words, a small drawing, a photograph – something about the event and/or our community.
We provided markers, coloured pencils, paint, sketches that could be coloured in, and other materials and tools to help kick-start ideas. We had no idea how this project would receive much attention or how many would want to participate. As well we anticipated some would be a bit nervous about contributing, with claims of not having any art talent. But it became clear that we need not have worried. Children as young as age 2 added painted handprints. Others showed off their drawing skills and added very creative pictures. Colouring and words came from some of our seniors who are in their 80s. Our local firefighters, paramedics and our local Junior “A” hockey team shared their vision by adding drawings and their logos. And having them around the table attracted even more people who then wanted to participate and add their ideas. Even our local City Councillor coloured a sketch for us. One benefit that we had not really considered was how enjoyable this exercise would be, to take the time to colour and be creative. For some it had been years since they enjoyed such an activity. We have some local businesses and service groups ready to show off this community montage. And we hope more will step forward and display it. We did have the foresight to do this montage on rolled canvas, and it will be varnished so that not only can it be hung or put on a table, it can also be placed on a floor and walked on. And storage will be easier when it can be rolled up. We are now beginning to brainstorm ideas for next year. And you can be sure it will definitely be another community participation project. When posting photos or photos of your art on a website, it's always a good idea to add a watermark so others cannot claim it as their own. Here are some tutorials, depending on what software you may have:
Photoshop: http://youtu.be/vxRdQ9Bnusw PhotoBucket.com: http://youtu.be/ALnyb3E1vGY Picasa: http://youtu.be/eQSHjxYsRX8 PhotoBucket and Picasa can be downloaded for free. I've tried the Photoshop option, and had little problem. As mentioned in a previous blog, I was thinking of trying chalkboard paint as I needed to get all my little post-its under control. The project is now done and already is proving to be working just fine.
Finding the paint was no problem; it seems to be available at any retail store that carries paint. I had a choice of 12 different colours, as well as basic black. I opted for the black. Once I got home, I was all set to get started. Instead of painting a part of the wall, I decided to paint over an old painting, about 2' x 3', so I could have a portable chalkboard. Now, I discovered there are a couple of things to be aware of with chalkboard paint. It's not quite as fast as those home decorating shows on TV make it look, so be sure to read the directions: - Once painted, you have to wait 3 days before the chalkboard can be used. - And after the 3 days, the board has to be conditioned by adding chalk all over, then erased. - And it cannot be wiped down with a wet cloth for 7 days. Patience is a virtue in this case. I also needed to stock up on chalk. This proved to be a bit more difficult. Sidewalk chalk is abundant at this time of year. An office supply section did not seem to stalk regular chalk, despite searching up and down three aisles over and over. Finally I checked the children section, the part that carries crayons. Aha! It seems that Crayola makes chalk, available in white and in boxes of 12 colours. With chalk in hand I then got my new chalkboard conditioned. Voila! Ready for use. Notes are now transferred and little doodles and sketches. Who knows, maybe a new career as a chalkboard artist will be next! I recently moved my studio from a small bedroom to a much larger bedroom in our basement. It was a lot of work, and many trips up and down stairs.
But definitely worth it. It gave me a chance to go through all the "stuff" I've been collecting over the years, and I was actually able to purge some things. Decluttering really does help clear the brain too. It also meant I could get all the stuff better organized. There are lots of ideas out there that can help keep a studio organized, and I thought perhaps I could share with you what has worked for me. So here goes: - I got all the junk out of large bins and organized by item type into small bins and shoe-boxes, with labels. Some people like to use large mason jars so they can see at a glance. I'm a fan of this idea too. A bit time consuming to get this sorting done, but worth it - saves lots of time later searching for stuff. - My magazines are now organized by type. I kept seeing recommendations to simply tear out pages and ideas that I'm attracted to, then toss the rest of the magazine. But I don't like to follow that suggestion as I believe that tastes can change and something that I didn't look at today may catch my attention tomorrow. So I decided to keep my magazines intact, but at least sorted by type. - Organize your space by need. I now have actual workstations. Where before I had only a small space for making cards AND painting AND using my computer, now I have a separate space for each. It's far less distracting, and I don't have to do nearly as much cleaning and tidying up just to make space. This suggestion does depend on the size of space you have available, and a bit of creativity at times to get it all to fit. - I'm considering painting part of one wall with chalkboard paint. I have far too many post-its and little notes. My thinking is that it would be easier to jot down reminders and ideas on a chalkboard. Besides, post-its sometimes fall off the wall, never to be found again. - Paint your room in a colour that you can work in. My studio is teal - a colour chosen by my step-daughter when this used to be her bedroom, but it works for me. I find it soothing and inspiring at the same time, not overwhel I hope these are of some help. More ideas to come in future blogs..... I needed a new project recently for my coloured pencil class. So I went with a recommendation to have each member of the group re-create one square of a painting. With 9 in our group, I cut up a picture into 9 equal-sized pieces. Each person then was given a blank piece of paper in a larger size, with instructions to draw in then use colour pencil to "paint" their section of the picture.
I knew that the final piece, once all 9 pieces were together, would be quite different - after all, each person in the class has a unique style - but should look something like the original. I was nervous at how it would turn out but hopeful at the same time. We didn't quite complete the project in one class (we'll finish it next class), but the results are already in. And the best part was the comments from each of my students. They knew they had different levels of experience, they all tend choose different colours and shades, some go with vibrant tones, others muted, some choose unexpected colours, others try to copy exactly. Some add many layers of pencil and press hard, others have a very light touch. Some use 2-3 colours to create a new colour, others go very monotone. Each person recognized all these differences in the work of the others. Each saw how they could try something that another had used, and see how it works for them. And each received something very valuable from the others. Recogition. The support and praise for each other was very evident in our art room. They recognized the varying styles and how each of them brought their own individuality to the painting. And although each was very different, it was because they are all unique personalities, and they began to appreciate that when we re-create a piece, the idea is not to duplicate it but to interpret it with your own style. I would say we had a very successful class. Can't wait for next one. While looking for some fresh ideas to use when teaching coloured pencil techiques, I stumbled across a fun website - colourful, lots of ideas - basically to make doing art fun, and geared to all skill levels. All free ideas, from someone who wants to share her passion with others.
http://www.art-is-fun.com/ There are suggestions for different mediums - not just coloured pencil, but also pastel, watercolour, ink, acrylic - and also for different styles and subjects. Check out her newsletter too. Lots of fun ideas and links each issue. Hope you enjoy. If you've found a website you enjoy and share, please let me know and I will post it here. |
Awakening the heart
with art Artist - Anne Warburton
Subscribe
& add this blog to your RSS Reader with this link: Or email me: annewarburton@hotmail.com Categories
All
About MeIt's taken years to discover the medium I enjoy the most. And how what I have learned before somehow fits into what I am doing now. Even when I travel my needles and threads are with me so I can continue to create while away. Archives
June 2016
|



 RSS Feed

